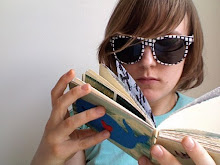
A do-si-do book, like the partner square dancing move, swings between 2 signatures. These books are like two books in one and are excellent for dual purposes, like drawings and notes, or double themes like opposites or pairs. Read on and you’ll be whipping up your own fine books in no time!
Materials & Tools:

- paper
- scissors
- linen thread
- needle
- bone folder
- awl
- pencil
Step 1:

Prepare two signatures and the covers. To make each signature, fold 5-10 sheets of paper in half and trim to size. Choose a sturdy paper or lightweight board to use as the cover. Cut the cover to be the same size as the height of the signatures and as wide as three times the width of one signature. Fold the cover into thirds using a bone folder, so it forms a Z shape.
Step 2:

Make a sample signature that is the same height and width as your signatures out of a single sheet of paper. Measure and mark the placement for 3 holes on the sample signature. You’ll use this as a guide for making holes in your signatures and covers. Put one signature into one of the folds of the Z shaped cover. Using a bookbinder’s awl and your sample signature as a guide, punch 3 holes through each signature and cover.
Step 3:

Pull the threaded needle through the center of the first signature, leaving a tail of thread a couple inches long inside the signature.
Step 4:

Push the needle through the top hole on the spine of your book.
Step 5:

Pull the needle through the bottom hole on the inside of your book, skipping over the center hole and thread tail.
Step 6:

Pull the needle through the center hole on the outside of the book.
Step 7:

When you pull the needle into the center of the book again, make sure that the needle and thread is on one side of the long center stitch and the thread tail is on the other. Remove the needle and trim the threads. Pull each thread taut to even out the tension of the stitching.
Step 8:

Tie a simple knot over the long center stitch.
Steps 9-16:
Repeat steps 1-8 on the second signature.
Step 17:

Ta da! Do a little dance and away you go! Fill you book with notes, drawings, secrets.


